 Rosa Martinez
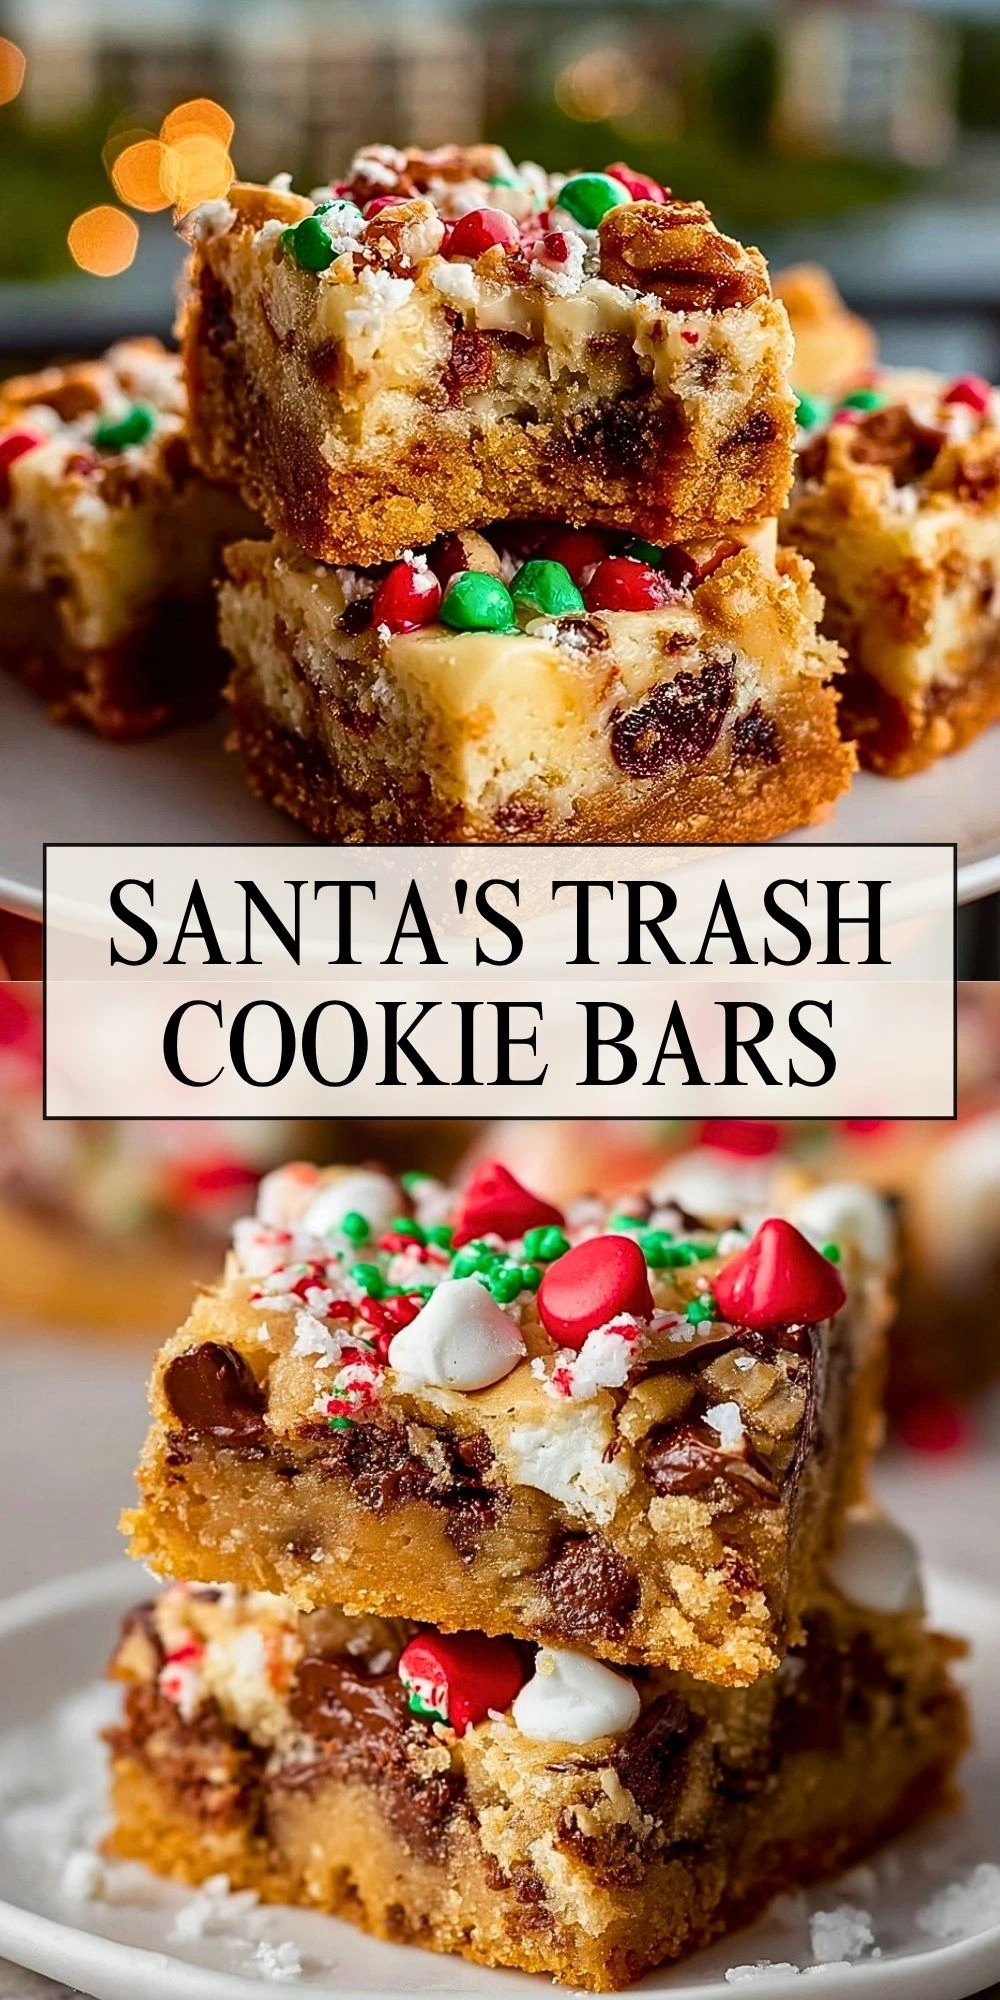
The first time I made Santa’s Trash Cookie Bars, I knew they were going to disappear fast. They have everything I want in a festive dessert bar: soft and chewy cookie dough, melty chocolate, crunchy pretzels, colorful candy pieces, and that sweet-salty balance that keeps everyone reaching for one more square.

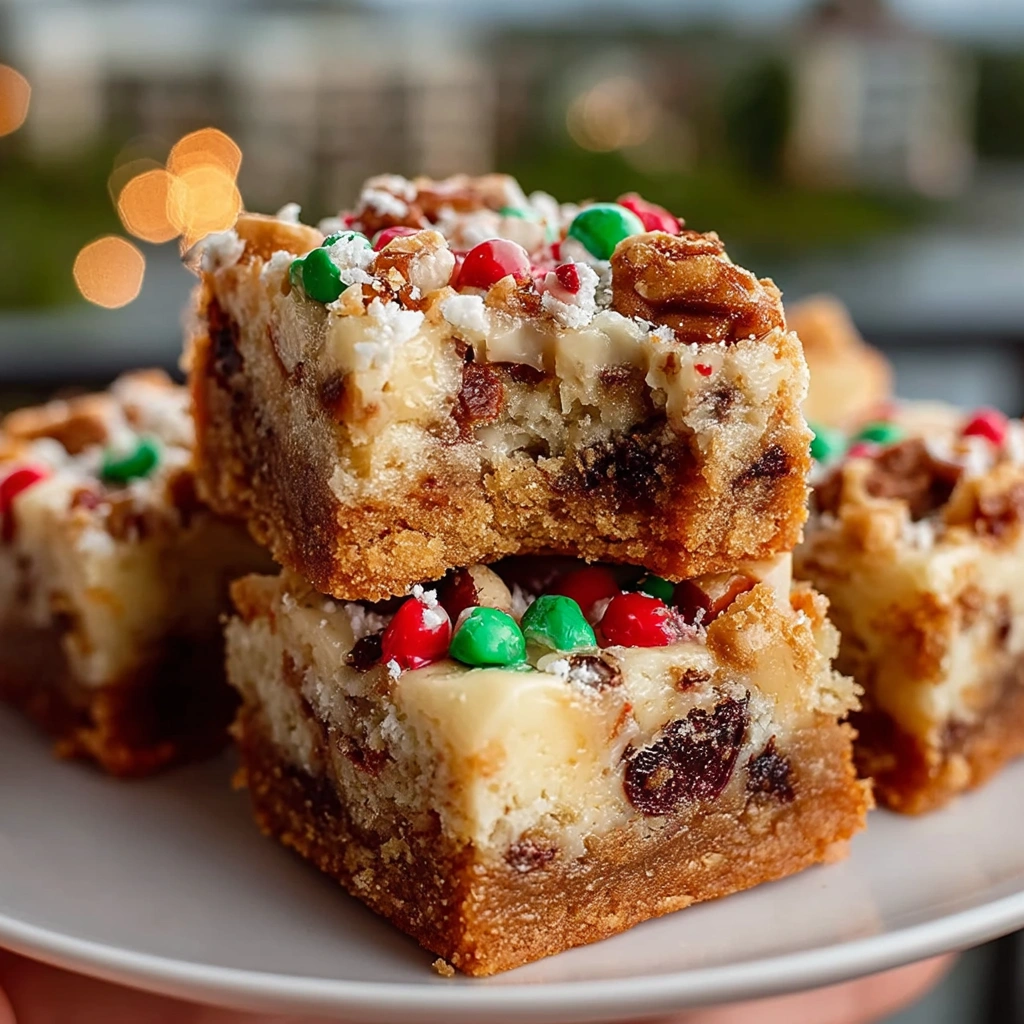
I love making these during the holiday season because they feel playful, easy, and completely unfussy. They bring the same cozy energy as my S’mores Cookie Bars, but with a Christmas twist that makes them perfect for cookie trays, parties, and late-night kitchen snacking straight from the pan.
Why You’ll Love These Santa’s Trash Cookie Bars
I come back to these bars again and again because they are simple to make and packed with texture. Every bite has a little surprise, from gooey chocolate chunks to crisp pretzel pieces and bright candy-coated chocolates.
I also love that this dessert is flexible. I can use whatever holiday baking mix-ins I already have in the pantry, which makes it ideal for busy weeks when I want something festive without making three different cookie doughs. If you enjoy easy holiday treats like my Simple Pecan Pie Bars, this one fits right into that same low-stress, high-reward kind of baking.
What Makes Santa’s Trash Cookie Bars So Irresistible?
What makes these bars stand out is the contrast. The base bakes up rich and buttery, while the mix-ins create little pockets of crunch, caramelized sweetness, and soft melted chocolate. Instead of feeling overly sugary, the salty pretzels and nuts help balance everything.
I also think they are one of the easiest holiday desserts to customize. You can make them extra chocolatey, lean into peanut butter candies, or keep the topping simple with red and green candies for a classic Christmas look. They feel homemade and fun without being fussy.
Ingredients for the Santa’s Trash Cookie Bars
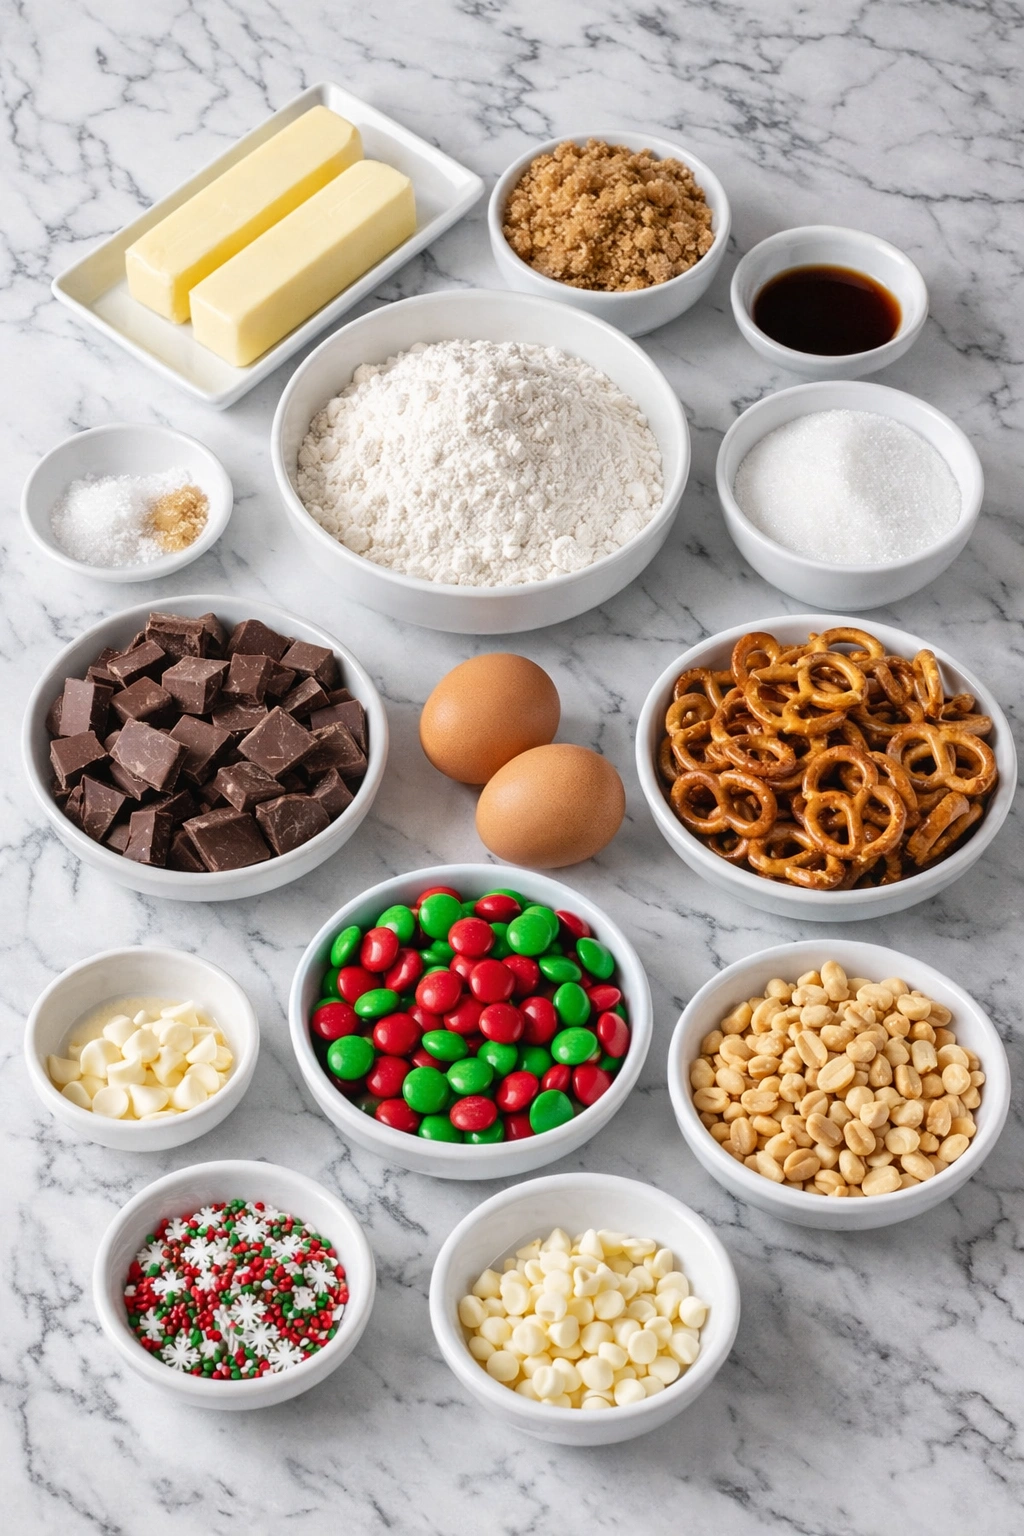
I like using simple ingredients here, but each one matters because it adds to the texture and flavor that makes these bars so memorable.
Butter gives the bars their rich, soft, chewy base and helps everything bake up golden around the edges.
Brown sugar adds deep caramel flavor and keeps the texture moist and fudgy instead of dry.
Granulated sugar lightens the dough just enough and helps create those slightly crisp edges.
Eggs hold the dough together and give the bars structure while still keeping the center tender.
Vanilla extract rounds out the sweetness and makes the whole pan smell like holiday baking.
All-purpose flour forms the base of the dough and keeps the bars sturdy enough to hold all the mix-ins.
Baking soda gives the dough a little lift so the bars stay soft instead of dense.
Salt balances the sweetness and sharpens all the other flavors.
Chocolate chunks melt into rich pockets throughout the bars and make every bite feel extra indulgent.
Red and green candy-coated chocolates bring color, crunch, and that unmistakable Christmas-cookie look.
Mini pretzels add salty crunch and make the sweet-salty combination stand out.
Chopped peanuts add a nutty bite and help reinforce the “everything-but-the-kitchen-sink” feel of these bars.
White chocolate chips add creamy sweetness and look especially pretty on top.
Holiday sprinkles or sugar snowflakes make the finished bars look festive and bakery-worthy.
How To Make the Santa’s Trash Cookie Bars
I always recommend lining the baking pan before you start. It makes lifting and slicing the bars so much easier once they cool.
Step 1: Prep the pan and oven
Preheat your oven to 350°F. Line a 9×13-inch baking pan with parchment paper, leaving a little overhang on the sides so you can lift the bars out later.
Step 2: Cream the butter and sugars
In a large bowl, beat the softened butter, brown sugar, and granulated sugar together until the mixture looks light and creamy. This step helps create that soft, chewy cookie bar texture.
Step 3: Add the eggs and vanilla
Mix in the eggs one at a time, then stir in the vanilla extract. I like to scrape down the bowl here so everything blends evenly.
Step 4: Whisk in the dry ingredients
Add the flour, baking soda, and salt. Mix just until the dough comes together. I try not to overmix because that can make the bars tough instead of tender.
Step 5: Fold in the holiday mix-ins
Fold in most of the chocolate chunks, candy-coated chocolates, pretzel pieces, peanuts, and white chocolate chips. Save a small handful of each for the top so the finished bars look loaded and festive.
Step 6: Press the dough into the pan
Spread the dough evenly into the prepared pan. The dough will be thick, so I usually use an offset spatula or lightly greased hands to press it into the corners.
Step 7: Add the topping
Scatter the reserved mix-ins over the top and finish with holiday sprinkles or sugar snowflakes. This gives the bars that cheerful Christmas-cookie-shop look.
Step 8: Bake until golden
Bake for 28 to 34 minutes, or until the edges are golden and the center looks just set. I like to pull them out when the middle still looks slightly soft because they continue to firm up as they cool.
Step 9: Cool and slice
Let the bars cool completely in the pan before lifting them out and slicing. Clean cuts are much easier once the chocolate has settled.
Serving and Storing Santa’s Trash Cookie Bars
This recipe feeds about 16 people if you cut the pan into generous squares, or up to 20 if you are serving them as part of a larger dessert spread.
I love serving these bars at room temperature when the centers are still chewy and the chocolate stays soft. They are perfect on a holiday cookie tray, tucked into treat boxes, or served with coffee after dinner.
To store them, keep the bars in an airtight container at room temperature for up to 4 days. If I want them to last longer, I refrigerate them for up to a week and let them sit out for a few minutes before serving. They also freeze beautifully when wrapped well.
What to Serve With Santa’s Trash Cookie Bars
1. Hot chocolate
A warm mug of cocoa makes these bars feel even more festive and cozy.
2. Vanilla ice cream
A scoop on the side turns them into an easy holiday dessert plate.
3. Coffee or espresso
The slight bitterness of coffee balances the sweetness of the bars really well.
4. Holiday cookie platters
I love pairing these with treats like Melted Snowman Peanut Butter Cookies so there is a mix of soft, crunchy, chocolatey, and decorated desserts on the table.
Frequently Asked Questions
Can I make Santa’s Trash Cookie Bars ahead of time?
Yes, and I actually think they are a great make-ahead dessert. Once the bars are fully cooled, I store them tightly covered at room temperature for a couple of days. They stay chewy, slice neatly, and are easy to set out whenever guests arrive.
Can I change the mix-ins?
Absolutely. That is one of the best parts of this recipe. I like using chocolate chunks, pretzels, and holiday candies, but you can swap in peanut butter chips, toffee bits, chopped walnuts, mini marshmallows, or crushed sandwich cookies depending on what you have.
Why did my bars come out too dry?
Usually that happens when they are overbaked or when too much flour gets packed into the measuring cup. I spoon flour into the cup and level it off, and I pull the pan from the oven when the center is just set. The bars finish firming up as they cool.
Can I freeze Santa’s Trash Cookie Bars?
Yes. I let them cool completely, then slice and layer them between sheets of parchment in a freezer-safe container. They keep well for up to 2 months. I thaw them at room temperature before serving.
What is the best way to get clean slices?
I always let the bars cool fully first. Then I use the parchment to lift them out of the pan and cut them with a sharp knife, wiping the blade between slices if the chocolate is especially soft.
Save This Pin For Later
📌 Save this recipe to your Pinterest dessert board so you can come back to it any time.
And let me know in the comments how yours turned out. Did you add extra pretzels, swap in peanut butter candies, or pile on more chocolate? I love hearing how others make these treats their own, and questions are always welcome too.
For even more festive baking inspiration, you can find more ideas on Life With Rosa.
Conclusion
Santa’s Trash Cookie Bars are the kind of holiday dessert I make when I want something cheerful, crowd-pleasing, and easy to pull together with pantry staples. They are buttery, chewy, colorful, and packed with all the textures that make dessert bars impossible to resist.
I love how flexible they are, and I love even more that they look like I spent far more time on them than I actually did. If you are building out a holiday dessert table, these bars fit beautifully next to classics like Chocolate Chip Snowball Cookies and other festive favorites from the site.
Print Santa’s Trash Cookie Bars
- Total Time: 45 minutes
- Yield: 16 bars
- Diet: Vegetarian
Description
Santa’s Trash Cookie Bars are a quick dessert packed with chocolate, pretzels, candy pieces, and buttery cookie dough in every bite. This easy recipe is perfect for holiday dessert trays, Christmas party treats, easy dessert ideas, festive baking days, and fun food ideas when you want a sweet and salty bar everyone gets excited about.
Ingredients
1 cup unsalted butter, softened
1 1/2 cups brown sugar
1/2 cup granulated sugar
2 large eggs
2 teaspoons vanilla extract
2 1/2 cups all-purpose flour
1 teaspoon baking soda
1/2 teaspoon salt
1 cup semi-sweet chocolate chunks
1 cup red and green candy-coated chocolates
1 cup mini pretzels, roughly broken
3/4 cup chopped peanuts
1/2 cup white chocolate chips
2 tablespoons holiday sprinkles or sugar snowflakes
Instructions
1. Preheat the oven to 350°F and line a 9×13-inch baking pan with parchment paper.
2. Beat the softened butter, brown sugar, and granulated sugar until light and creamy.
3. Mix in the eggs one at a time, then add the vanilla extract.
4. Stir in the flour, baking soda, and salt just until combined.
5. Fold in the chocolate chunks, candy-coated chocolates, pretzel pieces, chopped peanuts, and white chocolate chips, saving a little of each for the top.
6. Press the dough evenly into the prepared pan.
7. Sprinkle the reserved mix-ins and holiday sprinkles over the top.
8. Bake for 28 to 34 minutes, until the edges are golden and the center is just set.
9. Cool completely before lifting from the pan and slicing into bars.
Notes
Do not overbake these bars or they will lose that soft, chewy center that makes them so good.
- Prep Time: 15 minutes
- Cook Time: 30 minutes
- Category: Dessert
- Method: Baking
- Cuisine: American
Nutrition
- Serving Size: 1 bar
- Calories: 342
- Sugar: 27g
- Sodium: 176mg
- Fat: 18g
- Saturated Fat: 8g
- Unsaturated Fat: 8g
- Trans Fat: 0g
- Carbohydrates: 43g
- Fiber: 2g
- Protein: 5g
- Cholesterol: 41mg
Keywords: Santa’s Trash Cookie Bars, holiday dessert, Christmas cookie bars, easy dessert, festive baking, sweet and salty bars, dessert ideas, food ideas